I will be catching up a bit on posts from earlier this year... as this is the first time I've had to really get this off the ground. This post will not have all the details of the project (price of items)... sorry for that! I should have written it when I did it, but this year just didn't go as planned!
This first craft is from Christmas 2013. Our family has had several different ways of exchanging gifts over the years, but we have settled on the white elephant/chinese gift exchange approach. There are so many different names for it, but everyone brings a gift and everyone draws a number... and you can steal the gift... you know the drill. I decided on a yard game theme last year (and plan on keeping up with this theme in the years to come... maybe some yard jenga, corn hole, etc.) There's a $35 price limit that definitely gets stretched from time to time, but I try to stay as close to that as possible since $$ is always short that time of year.
This past year I started off the new "tradition" (I hesitate to call it a tradition because I'm always thinking of new things to make... I might not stick with yard games) with yard dominoes! The original pin took me to this site: http://www.soyouthinkyourecrafty.com/yard-dominoes-tutorial-by-chiwei-one-dog-woof/
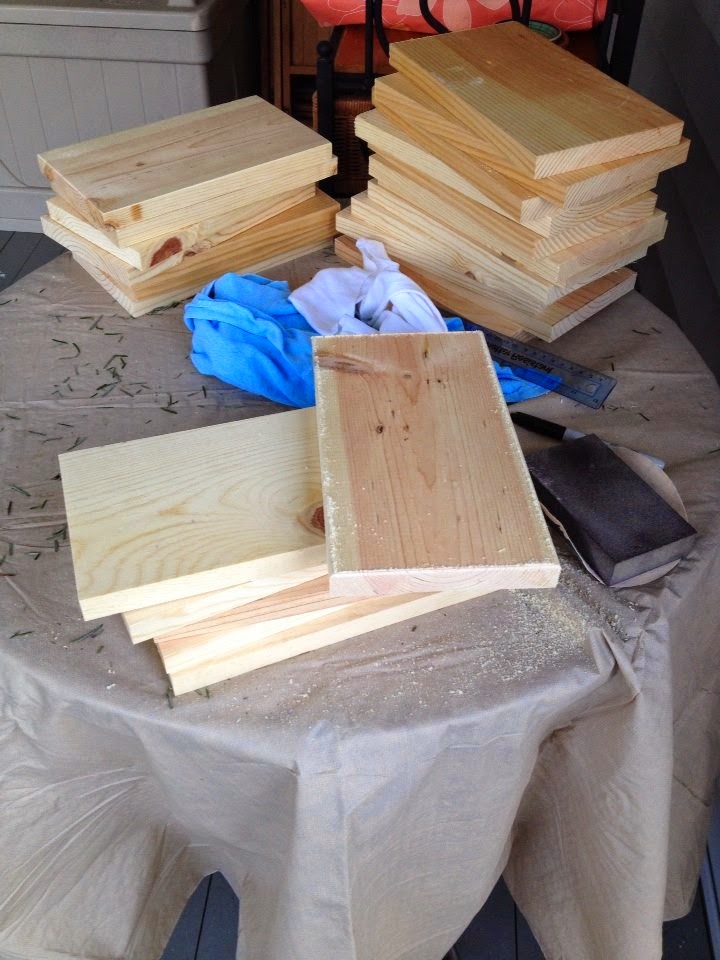
The blogger that posted the craft suggested a smaller domino than the one I made. Her thought: they fit in your hand! (She went with 1X4) My thought: bigger is better for laying out and seeing your blocks! (I went with 1X6) Though, after making a set, I suggest going with something in between our sizes? It takes a long time to make a set, and they are a bear to carry around... I'm not willing to say mine are too big because I love how they turned out, but....
Materials Needed:
- boards: 1X6 (X8) - turned out to be about $8/board at Lowe's and I needed 4 boards)
- pencil/black sharpie
- ruler (if you tend towards OCD-ness in projects, like me)
- sand paper (I used the block - it was easier)
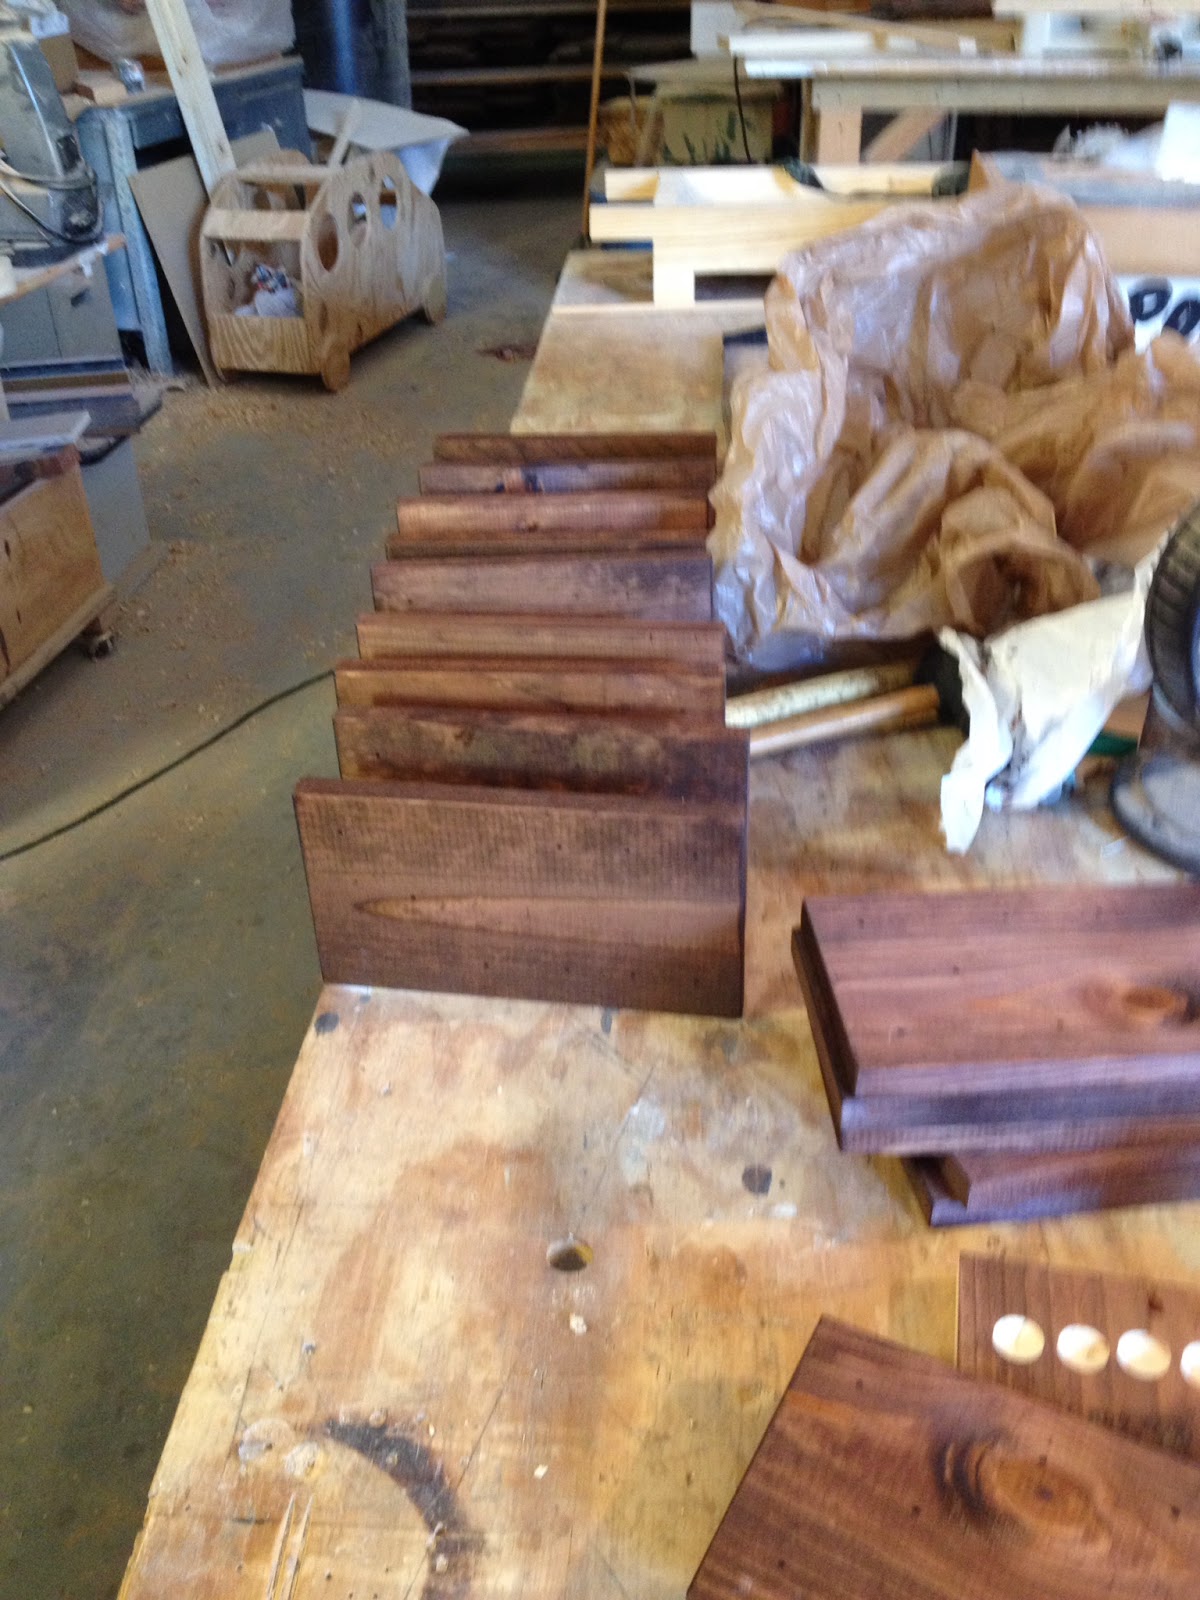
- wood stain (I went with a darker color so that you could see the contrast of the dots)
- sponge brush & rag
- sheets of plastic
- router (or a really nice person with a router who will help you make the holes for the dots) :)
1) Buy boards at Lowe's
2) You can get them cut at Lowe's - but I had an awesome friend who helped me out with his table saw
** I can't remember how long I made them - but I will measure the final product and get back to you on this
*** Cut some extras - you'll want them for checking the stain and practicing with the router) ***
3) "Ease" the edges: sand the edges and corners to smooth & round everything out a bit. Brush off all the dust before staining
3) Using the ruler and pencil, I marked the wood for the dots - I marked with pencil first, then marker. I measured out so that the dots would be evenly spaced and even with the other tiles
4) Stain the wood... you probably know this, but you put on a coat, and then wipe it right back off (take off the excess) - and do one side + edges, let dry, and then repeat for the opposite side (I let each side dry for a couple of hours
5) A day after staining, I had my super awesome friend help me with his router and we made dots on the boards where I had left a mark
6) Then you are done!! I think it would be cool to have a fun bag to put them all in... but I was already over budget and didn't get one (making a draw-string bag could be easy if you already have the material).
.JPG)
.JPG)


.JPG)

.JPG)

